
Last updated: November 4, 2026 – By Eddie Brennan
November 2026 update: refreshed the DIY oil-change steps, torque and disposal guidance.
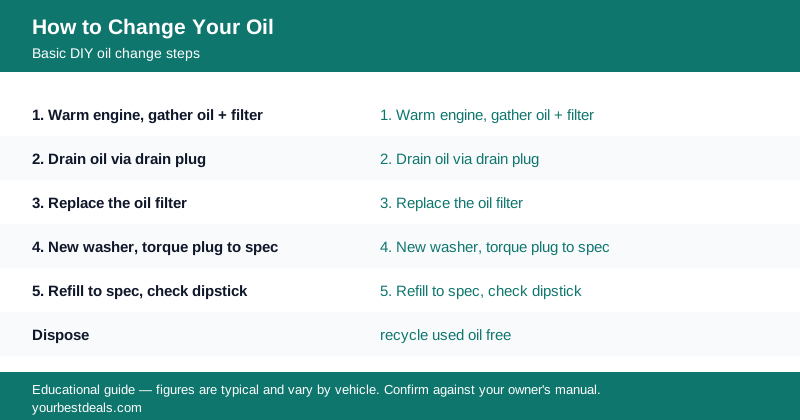
A DIY oil change is one of the most doable jobs there is, and it saves the shop labor. The short version: warm the engine, drain the old oil at the drain plug, swap the oil filter, install a new crush washer and torque the plug, refill with the correct oil to spec, and check the dipstick. Then recycle the old oil free at a parts store. You’ll need the right oil and filter for your car (see your owner’s manual), a wrench, a drain pan, a filter wrench, a funnel, and a way to safely raise the car if needed. Done carefully it takes most people about 30 to 45 minutes. I did thousands of these in the shop; here’s how to do it right.
Eleven years under cars in Columbus taught me that the oil change itself is simple – the mistakes that cause trouble are a stripped drain plug, a double-gasketed filter, and the wrong oil. Avoid those three and you’re golden.
The steps
Work through it in order, and don’t rush the plug and the filter – those are where problems start.
1. Prep. Run the engine a few minutes so the oil drains easily (warm, not scalding), then shut it off. Confirm you have the correct oil type, viscosity, and quantity, and the right filter. Raise the car safely on ramps or jack stands if you need clearance – never work under a car held only by a jack.
2. Drain. Position the pan, loosen the drain plug with a wrench, then remove it by hand and let the oil fully drain. Mind the hot oil.
3. Filter. Remove the old filter with a filter wrench (it’ll hold oil, so expect a spill). Wipe the mounting surface, lightly oil the new filter’s gasket, and spin it on hand-tight plus the amount the filter says – don’t over-tighten. Make sure the old gasket came off with the old filter (a stuck old gasket plus the new one is a classic leak).
4. Plug. Install a new crush washer on the drain plug and torque it to spec – snug, not gorilla-tight, to avoid stripping the pan threads.
5. Fill and check. Add the correct amount of new oil through the filler, a bit under the full capacity first. Run the engine briefly, check for leaks at the plug and filter, shut off, wait a minute, and check the dipstick, topping to the full mark. Reset the oil-life monitor.
For what the shop charges if you’d rather not, and the oil spec, see our oil change cost guide, what oil your car takes, and how to check your oil.
Shop Talk
Three things cause almost every DIY oil-change problem, and all three are avoidable. First, the double gasket: when you pull the old filter, check that its rubber gasket came off with it. If the old gasket stays stuck on the engine and you spin a new filter over it, you get two gaskets, a bad seal, and oil blowing out the moment you start the engine. Wipe the surface and confirm it’s clean and bare. Second, the drain plug: always use a new crush washer and torque the plug to the manual’s spec – over-tightening strips the aluminum oil-pan threads, which turns a $5 washer into a pan replacement or a thread repair. Snug is right. Third, the wrong oil: confirm the viscosity, type (synthetic if your car requires it), and quantity before you start. Overfilling causes foaming and leaks; underfilling starves the engine. And lightly oil the new filter’s gasket before installing so it seals and comes off cleanly next time. Finally, recycle the used oil – parts stores and many shops take it free. Do the job on ramps or jack stands, never a jack alone. Nail those points and a DIY change is really easy and saves you the labor every time.
What Gets Misdiagnosed
The most common self-inflicted “mystery leak” after a DIY change isn’t a bad part – it’s a double-gasketed filter or an under-torqued (or over-torqued-and-stripped) drain plug. People chase phantom leaks when the cause was the last oil change.
The other is a “low oil” light soon after: usually an underfill from not rechecking the dipstick after the oil settled, or a slow leak from one of those two sealing points. The pattern: confirm one clean gasket, a new crush washer torqued to spec, the correct quantity, and a dipstick recheck – and the job is trouble-free.
The Real Number
A DIY oil change is drain, swap the filter, new crush washer torqued to spec, refill with the correct oil, recheck the dipstick, recycle the old oil. It takes about 30 to 45 minutes and saves the shop labor. The three things that cause trouble are a double-gasketed filter, a stripped or loose drain plug, and the wrong oil – get those right and it’s one of the easiest, most satisfying jobs you can do. Always support the car on ramps or stands, never a jack alone.
Frequently Asked Questions
What tools and supplies do I need to change my oil?
You need the correct oil and filter for your car, plus a handful of basic tools, which keeps a DIY change cheap. The consumables: the right quantity of the correct oil (viscosity, type, and amount per your owner’s manual), a new oil filter, and a new drain-plug crush washer (many filters and some plugs come with one). The tools: a wrench or socket for the drain plug, an oil-filter wrench, a drain pan to catch the old oil (sized to your capacity), a funnel, and shop rags. If your car sits low, you’ll also need a safe way to raise it – ramps or a jack plus jack stands, never a jack alone. A torque wrench is strongly recommended for the drain plug so you don’t strip the pan. Optional but handy: gloves, a creeper, and a catch container to transport used oil for recycling. That’s it – a modest one-time tool investment pays for itself quickly versus shop labor, and the ongoing cost is just the oil and filter. Confirm the oil spec and capacity first (see our guide on what oil your car takes), then gather these items and you’re ready.
How long does a DIY oil change take?
For most people, about 30 to 45 minutes once you have the supplies and a safe way to reach the drain plug and filter – and it gets faster with practice. The actual draining takes 10 to 15 minutes to let the old oil fully come out, which is often the longest single step. Raising the car (if needed), removing and replacing the filter, swapping the crush washer and torquing the plug, refilling, and checking the level make up the rest. A first-timer might take an hour being careful; someone who’s done a few can finish in half an hour. Factor in a trip to recycle the used oil, which you can batch with other errands. Compared to driving to a shop, waiting, and driving back, a DIY change is often comparable in total time while saving the labor charge. The time is well spent for the savings and the certainty that it was done right with the correct oil. If your car has a hard-to-reach filter or requires significant jacking, it takes a bit longer – but for most vehicles it’s a quick, simple job. Don’t rush the plug and filter steps, though; that’s where the time saved by carelessness costs you later.
Do I need to change the oil filter every time?
Yes – replace the oil filter at every oil change, because a used filter holds dirty oil and contaminants and defeats the purpose of fresh oil. The filter traps metal particles and debris as oil circulates, and over a change interval it becomes loaded; leaving the old filter on means that trapped gunk and about a cup of old, dirty oil stay in the system contaminating your fresh oil immediately. Filters are inexpensive, so there’s no reason to reuse one. Always use the correct filter for your engine (your parts store or the filter maker’s lookup matches it to your vehicle), and install it properly: wipe the mounting surface, confirm the old gasket came off, lightly oil the new gasket, and spin it on hand-tight plus the turn the filter specifies. Don’t over-tighten, which makes the next removal miserable and can damage the gasket. Changing the filter every time is standard practice and part of a proper oil change – a change that reuses the filter isn’t really a complete job. So budget a new filter with every oil change; it’s a small part of the cost and essential to the result. The fresh oil deserves a fresh filter to stay clean.
How tight should the drain plug and filter be?
Snug to the manufacturer’s torque spec – not as tight as you can make it – because over-tightening is what strips threads and damages gaskets. For the drain plug, use a new crush washer and torque it to the value in your service information (often in the range of a firm hand-tight plus a little, but follow the spec); over-tightening an aluminum oil pan strips the threads, which is an expensive repair, while under-tightening leaks or lets the plug back out. A torque wrench removes the guesswork and is worth owning for this. For the oil filter, the rule is hand-tight plus the amount printed on the filter (commonly three-quarters to one full turn after the gasket contacts the surface) – no wrench-cranking. Lightly oiling the new filter’s gasket first helps it seal and prevents it from sticking, which also makes next time’s removal clean. Over-tightening the filter crushes the gasket and makes removal a battle. So the guiding principle is “snug and to spec,” not “as tight as possible.” Those two sealing points – the plug and the filter – are exactly where leaks start when they’re wrong, so give them the right torque and a fresh gasket/washer, and they’ll seal reliably without strain.
How do I dispose of the used oil and filter?
Recycle them – used motor oil and filters are accepted free at most auto-parts stores and many service shops and municipal recycling centers, and you should never pour oil down a drain, on the ground, or in the trash. Used oil is a recyclable resource and an environmental hazard if dumped, so collect it in a clean, sealable container (the empty jugs your new oil came in work well) and take it to a drop-off. Many parts stores (AutoZone, O’Reilly, Advance Auto Parts, and others) take used oil at no charge, and some take the old filter too; call ahead to confirm they accept filters and how they want the oil delivered. Let the old filter drain into your pan first, then bag it. This disposal is both the responsible thing and legally required in most places – improper dumping carries fines. The good news is it’s easy and free, so there’s no reason not to do it right. Batch the drop-off with other errands to save a trip. So plan for recycling as part of the job: sealable container for the oil, drained filter bagged, and a free drop-off at a parts store. It’s a small final step that keeps a DIY change clean and responsible, and it costs nothing.
Is changing my own oil worth it versus a shop?
For the savings and the control it gives you, often yes – if you’re comfortable with basic tools and have a safe place to work, DIY saves the shop labor and guarantees the correct oil and filter were used, though the convenience of a shop is real. The savings add up over time: you pay only for the oil and filter rather than oil, filter, and labor, and after a modest one-time tool investment the per-change cost drops. You also control exactly which oil goes in and that the job was done carefully. The trade-offs are your time, the need for a safe setup (ramps or jack stands), dealing with the used oil, and the fact that some cars have awkward filter access. If you’d rather not, a shop change is inexpensive and fast, and places like Walmart are cheap for a basic change. Many people do both – DIY when they have time, a shop when they don’t. There’s no wrong answer; it comes down to whether you value the savings and control over the convenience. If you’re mechanically inclined, DIY is one of the most satisfying, cost-effective maintenance habits. For shop pricing to compare against, see our oil change cost guide.
What mistakes should I avoid?
Avoid the three that cause nearly all DIY oil-change problems: a double-gasketed filter, a stripped or improperly torqued drain plug, and the wrong oil or quantity. The double gasket happens when the old filter’s rubber seal stays stuck on the engine and you install a new filter over it – two gaskets won’t seal, and oil blows out on startup, so always confirm the old gasket came off and the surface is clean. A stripped drain plug comes from over-tightening (especially in aluminum pans); use a new crush washer and torque to spec, snug not brutal. The wrong oil – incorrect viscosity, conventional where synthetic is required, or the wrong quantity – undermines the whole job, so confirm the spec and capacity before you start, and recheck the dipstick after the oil settles to avoid over- or under-filling. Beyond those, don’t work under a car supported only by a jack, don’t forget to reset the oil-life monitor, and don’t skip recycling the old oil. None of these are hard to avoid; they just require attention at the key steps. Get the gasket, the plug torque, and the oil right, support the car safely, and your DIY change will be clean and trouble-free every time.
Sources
DIY oil-change procedure verified against standard service practice and manufacturer torque/disposal guidance in November 2026. Always follow your vehicle’s service information for oil spec, capacity, and torque values.
- ASE – National Institute for Automotive Service Excellence
- API – engine oil standards
- EPA – recycling used motor oil
Related Guides
- What Oil Does My Car Take?
- How to Check Your Engine Oil
- Oil Change Cost Guide
- Too Much Oil in Your Engine
- Engine Oil & Lubrication Guides

Eddie Brennan is an ASE Master Certified technician who spent 11 years in an independent shop in Columbus, OH, doing brakes, suspension, and electrical diagnostics before a back injury moved him into writing full-time. He did thousands of oil changes in the bay and has seen every double-gasket leak and stripped drain plug there is. He drives a 2015 Subaru Outback with over 250,000 miles and a 2020 Ford F-150, and takes no referral fees or advertising money from any shop or chain.